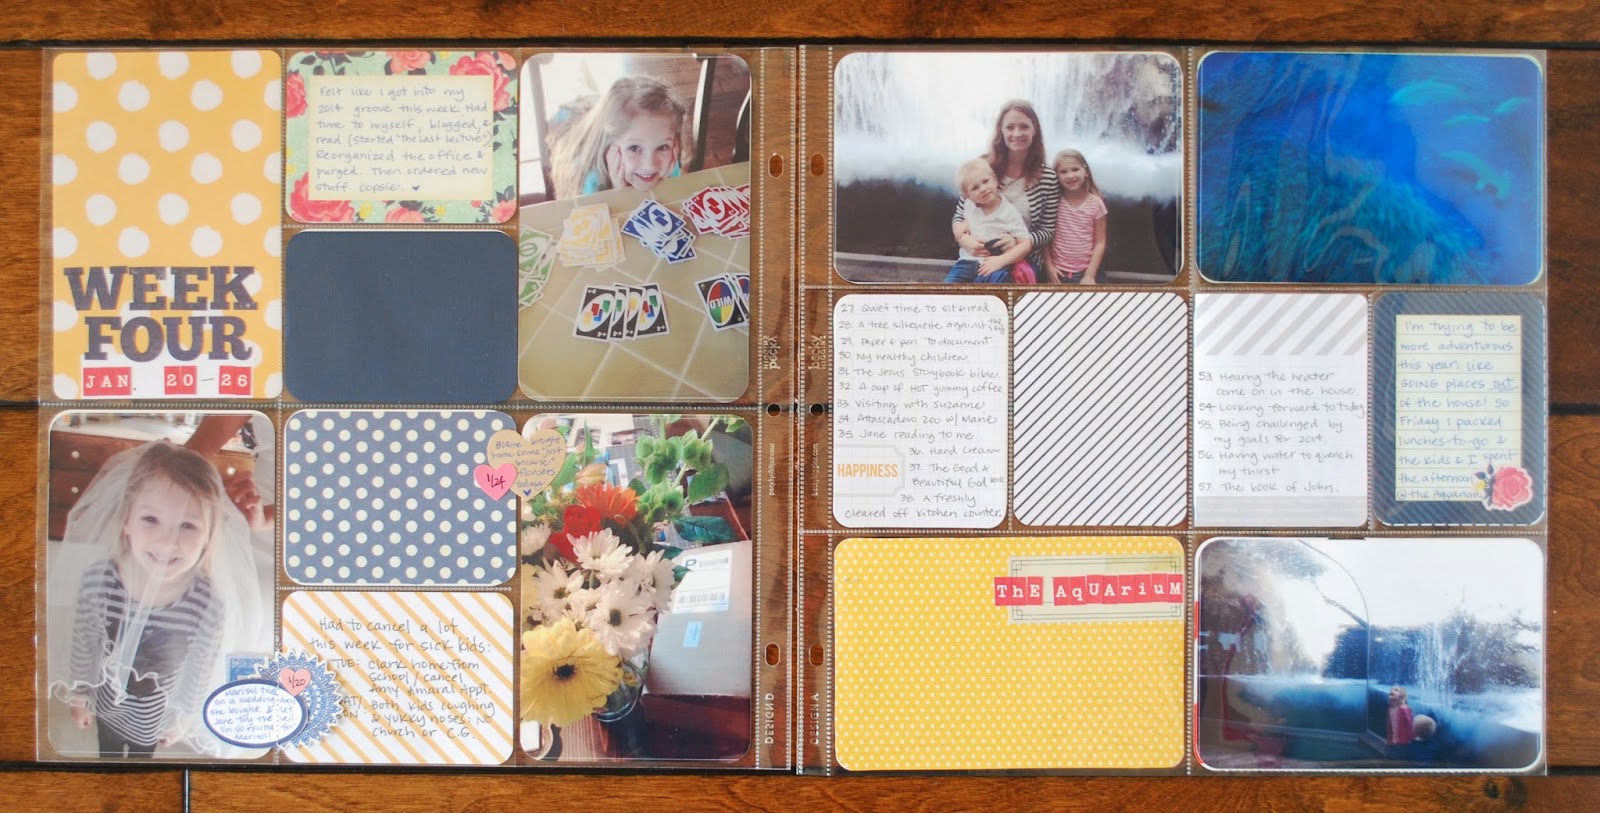
Showing posts with label scrapbooking. Show all posts

Monday, October 20, 2014

Just because it is cute

Sometimes I like to just play around with some of my favorite products.  Just because.  So here is a list of my favorite things:


Pretty printed paper bags

Turquoise

Glassine bags

Colored (and white!) shipping tags

Aqua

Doilies

Washi tape

Clips

Twine

Wood Veneer Shapes

Pink


Mix them all together and Voila!!


So much fun.  And so darn cute!!


What are your favorite go-to products?


Have a beautiful day,
Stacey

Thursday, October 16, 2014

O Tiny Christmas Tree! O Tiny Christmas Tree!

Seeing as I rarely post to this blog (are you all super sad?), I decided to show you a little project for Christmas time.  Something in advance!  woot.

For starters, this is a simple little project using just a few items/tools:
  • gold thread
  • a Tim Holz bottle brush tree (comes in a pack of 5)
  • Heidi Swapp Gold Lame' Color Shine (I am almost OUT!! yikes!)
  • a handful of Freckled Fawn wood veneer star-ish shapes
  • hot glue gun (and glue)
  • a cardboard box


Start Here. :)


I started out by spray painting the wood veneer star shapes. (NOTE: I ended up needing 50% more than are pictured here.) I usually put a scratch paper in an old Studio Calico box. The pizza box style is great to catch the over-spray, and compact enough to close up and put out of sight when done.

A couple squirts was enough.  I just pushed them around to cover on both sides.


This Color Shine is seriously amazing. The goldey-shiney-sparkley goodness is unattainable in photographic form!


 I then hot glued the little stars along a length of gold thread.  Word to the wiser-than-me: don't squeeze a crap-ton of boiling hot glue onto your fingertips and scream like a little girl.  I'm sure you wouldn't anyway, but take it easy out there.  I spaced them approximately (because I did NOT measure) 1/2 inch apart.


 Now, I am not one to brag - but I am a genius.  The little tree kept falling over.  They are made out of whisps of the wind or something.  So - BAM! - my genius thought hits me: "Stacey, use those removable Glue Dots that you have never used and are entirely useless for nearly* everything else you do!" So I applied on to the tree "trunk" and it worked! It really did! It stayed standing!

(*note: to be fair to the otherwise lovely Glue Dot Corporation, once I used these particular Glue Dots to hold an envelope closed so I could open it again)


 Look how cute this tiny little garland turned out! Gold. Bam! Instant awesomeness.
I also glued one of the stars to the top.  Every tree needs a topper.  Amiright?!


String the little garland around your tree, and voila!  So beautiful and simple.  AND GOLD.  I'm dreaming of a white (and GOLD) christmas.


Just add Frankincense and Myrrh.


Much love and cheer,
Stacey

Wednesday, July 16, 2014

This is a scrapbooking process post

Sorry to all you multitude of blog readers who check in to read all about my emotional waxing of poetic verbiage regarding my life, God, and other random thoughts.

This blog post is only scrapbooking.

Last month I took these photos with my cell phone as I went through the steps to complete this scrapbook page about my son's birthday:  


As you can see, I started with a sketch.  This particular one was from a blog post from Studio Calico.  On the left you see my stack of photos with the sketch, and on the right my completed page.


And, now for the excitement!  The process is simple:

1. I cropped my three photos to the same size (3.3x4.5) down from the standard 4x6.


2. I trimmed my white cardstock down 1/2 inch on two sides.  This creates a nice frame to show on the background orange cardstock.


3. I laid out my photos and measured where I wanted my title to go.  


4.  I cut out my son's name with my Silhouette Cameo. 


5. I backed all my photos with a different pattered paper - leaving a very thin border.


6.  I decided to back my die-cut title with various patterned papers.  So I trimmed small rectangles out and glued them to the back of the die-cut white cardstock.


7.  Here is how it looks from the front - with the photos adhered also.


8. I adhered small foam Thickers to the title by first sticking them to a ruler.  Then I moved the ruler (with the stickers on it) around to decide where I wanted them.  Once I was happy, I carefully stuck the top half of the Thickers in place and peeled away the ruler.  A super easy and great way to get placement right.


9.  Lastly I added three shipping tags to the top of the layout.  When I trimmed the excess off, I reverse mirrored them along the bottom.  This continues to draw the eye down the page, past the title, then photos, and to the journaling.


So that's how I went from sketch to completed page:


Easy, Peasy, Lemon Squeezie!


Have a lovely day,
Stacey

Monday, June 16, 2014

Project Life: April

Yay!

More documentation of my "mundane" life :)

I just got off the phone with my friend - my BFF from high school.  What a great moment to hear her voice after such a long time!  She & I haven't spoken in who-knows-how-long, but we just picked right up where we left off.  


Do you have a relationship like that?  Someone who may be far away (physically or situationally) and yet near and dear to your heart forever?  I am so grateful I have a few ladies in my life like that.  


My Project Life album is documenting these amazing blessings that are my women friends.  Clearly I NEED them in my life, and I appreciate them soooo much!  Although my daily life is focused on my kids and making them my priority - it is important to me to make personal connections with my friends.  That is truly what I am all about. 


In Week 14 I was so super duper excited to celebrate my other bosom buddy: Marisol!  What a joy it was to watch her lovely smile as she excitedly anticipated her upcoming wedding at her bridal shower.


In Week 15 I was so happy to celebrate my friend Kelli's birthday by throwing her a  little dinner at our house.  She is wonderful.


In Week 16 my AMAZING friend/cousin took my kids for the week of spring break so I could work (training some swimming instructors).  She is a gift to me!  Then we got to Easter plan and shop and talk and drink and laugh and play and hang out, too!!


In Week 17 I got to spend a little adult time with my homegirls Liz & Yvonne.  We shopped and day-drank.  How great is that?!


In Week 18 I spent one afternoon (National Scrapbook Day, People!) with my crafty friends Christina & Marty.  We mostly ate and talked, and why shouldn't we?


As you can see, I love people.  I am blessed beyond measure with enough food, shelter and clothing.  But I am especially blessed by the friendships and the real connections we can make through them.  You want to talk makeup and clothes? - I'm probably not your gal.  You want to talk deep thoughts, longings, childhoods, and joys?  - Oh, heck yes.


Loving reality,
Stacey

Saturday, June 7, 2014

Project Life: March

When I began 2014 with the goal of scrapbooking in the form of Project life, I had no idea that I would actually like it!  It gives me a creative outlet while documenting what some might consider the mundane parts of our lives.  

But I LIVE in the mundane, people!

The most trying, frustrating, absolute-insanity-making moments of my life are rather mundane.

"get dressed"

"get dressed"

"get DRESSED"

"GET DRESSED!!!!!"

You know those moments?  The I-am-trying-to-get-these-little-people-to-follow-my-directions moments?  


Some of my most beautiful, lovely, tear-inducing moments are also mundane.


"You are the best mommy in the world"
(spoken when they aren't even asking for ice cream)


Watching one jump higher, read stronger, play with an imagination that is so out-of-this-world awesome - this is pure beauty.


And THAT is why I scrapbook anyway.  To leave a mark in this world that we were here, dangit!

We matter.

They matter.

You matter.

{Writing the word matter a bunch of times looks weird.  It sounds weird in my head, too. }

And that matters, too.


Nothing is really mundane.  It is just part of my story.  My average, run-of-the-mill, so-so, bench-ridin', hold the hot sauce, kind of story.

And it is beautiful.

So is yours.


Fondly,
Stacey


Tuesday, April 29, 2014

February Project Life!

What's that you say?

It is almost May?

But, it's not, yet.  :)

You may know that my husband had hip surgery Feb 24.  And has been on crutches or the ice machine since.  And I've been doing most of the cooking, cleaning, caretaking, etc since then.

***insert my high school swim coach's daily mantra/quote here:
"Excuses lessen the pain of failure, but never lead to success."

So I'll just say, I AM doing stuff.  Scrapbooking, cleaning (kinda), laundry (lotsa), and caretaking.  I just haven't blogged about it.  I apologize.  I know you've all been holding your breath out there in the interwebs.

So, here are my Project Life pages for February!!


I started getting the Studio Calico PL kit.  It is fun!  And probably WAY too much stuff.  I'm starting to hoard.  A little.


Week 9 began with surgery.  It went well, but recovery has been rough.  If you pray, maybe you could lift up my husband for his endurance in this recovery.  It is hard for both of us.


But I am so, SO grateful for today.  The sun is shining, I have some time to myself, and I am making cards and blogging and scrapbooking a little this morning.  I am healthy.  My family has shelter, water, clothing, and love.

What more could a girl ask for?

Haha.  A lot more, I guess.  Starts with L.  Ends with "ouis Vuitton" Ha.

But it wouldn't truly make me happy!

Only a little...


Totally grateful for what I have today,
Stacey


Monday, February 17, 2014

Project Life: weeks 1-5

EEEVVVVEERRRrrryybody's doing it.  At least it seemed like everybody but me in the scrapbooking world was doing Project Life scrapbooking.  It is a simple system of getting your life documented: doesn't involve any scissors or glue.  Just slide your pictures into these 4x6 or 3x4 inch pockets.  Slide the cards into the other spaces and voila! - scrapbook!

It is a system created by Becky Higgins.  I mentioned in my New Year's resolution post  (HERE) that I was going to start with the new year... AND I DID!!  


The book is a binder (super easy for putting pages in and out of).  Above is my title page.  I am using the Midnight Edition of the Project Life card sets.  It is black/grey/white with pops of yellow, so it is very neutral. 

Aaaannnd it just so happens to match our little Christmas card photo shoot by the Uber-talented Patty Schmidt Photography.  So I used those pics for the cover: perfection!


Week one was so full of photos that I used a small insert page in order to include all the shots I wanted. I mean, we WENT TO THE ROSE BOWL! (Go Stanford!)


I'm not sure if the rest of 2014 will quite measure up to the first week: NYE at the Harmons', Rose Bowl, followed by three nights of scrapbooking at Cousin Patty's house!

Probably not.


Additionally, I'm attempting to document 1,000 blessings (Inspired by the book 1,000 Gifts by Ann Voskamp).  You'll start seeing my lists show up here in Week 2...


A little note on how this whole scrapbooking "Live in the NOW"...

  1. It is made possible by the advent of the iPhone.  Probably 95% of these pics are taken by the camera I have with me: the one on my phone.
  2. It is made possible by the Canon Selphy printer (I have the CP900).  They have an app that allows you to wirelessly print from your phone.  SO. EASY.  The quality isn't stellar with the phone picture + home printing, but it is DONE.  And I am all about getting it done.


So there you have it: Project Life.  I really enjoy traditional scrapbooking - it is "my thing" for sure.  But I was getting weighed down with an entire scrapbook page for me to tell these daily moment stories.  I like that they are here, documented, saved, cherished - REAL LIFE moments.  And when I have a longer story to share, an event, or something that I really want to stand out, then I can take the time to be artsy and wordy and take up as much space as I want.


And now that I already have documented January 2014: it feels so so good.

Maybe this would be an easier, less stressful way for you to document your family's story?  Many people do it monthly, or with no time restraint at all.  What do you do?

One thing I will encourage is to print those pictures.  Get them in your hands.  If you have time, jot a note on the back.

I bet you love coming across photos of yourself, your parents, and other loved ones that help you know more about your/their life.  I do!

Let me know if this helps or hinders you today!

Hoping it helps,
Stacey


Tuesday, January 28, 2014

What to do with all those Christmas Cards:

Do you have a wall in your home that looks similar to this?:


No?  

Oh, me neither.

I'm not lying!  Saturday night (yes, it was January 25) my homegirls came over and brought their piles of Christmas cards/pics.  Then I (finally) took mine down & we DID SOMETHING WITH THEM!

Isn't it grand?!

For the past few/several years I have been copying this exact same layout multiple times over to scrapbook the lovely Christmas cards I receive.  I'm not quite done with this years', so here are the photos from my 2012 cards:

 (sorry for the creepy blurred heads, but I didn't feel right about putting so many people's 
faces/children unknowingly out in "The Internets")

I've seen various documentation others have done with these cards.  Many people keep them all in one album.  A Christmas card album with several years' worth of cards in there.

But, although I make scrapbook pages in no particular order, I store each page chronologically in my albums.


If this looks like something you'd like to try, I will give you some simple steps to follow along:


  1. Gather all of your cards/letters/pictures.  Separate them into those 3 piles.  (I usually throw out the cards, unless there is a personal note inside)  
  2. Ruthlessly trim down all the photos - cutting out the cute bench/tree/old barn door and sometimes even their full length bodies. 
  3. Sort the trimmed down photos into piles.  You don't have to do this, but I usually have all my family on the first pages, close friends second, and then all our other friends and acquaintances later.
  4. Choose 2 patterned papers.  Trim paper into 3x12 inch strips.  Adhere to the bottom of your cardstock.  
  5. Choose 2 washi tapes.  I recommend choosing ones that contrast with your paper, in order to stand out.  Adhere onto cardstock just above the paper.  (In 2012 I glued down a sequin ribbon between the paper & washi tape)  Use a thin strip of paper, ribbon, or other trim as another option!


6. Adhere down your photos.  Some tips: I start with big photos in the bottom inside border & build up and out from there.  Also, notice that the margins between each of the photos and the washi is all the same.  This space gives rest for the eye and provides a sense of order with all those photos!

7. I use a label punch to punch out how ever many of the medium size labels that I need (one for each photo).  I used a gold vellum in these photos.  I have used either cardstock or a very subtle patterned paper in the past. Use what you have! Then I write (in Sharpie) their family's name on each & adhere to the photo.


8.  For the easiest embellishing ever, I used the Heidi Swapp Color Shine (this is a liquid paint in a tiny spray bottle) in Gold Lame to sprinkle on the pages.  It dries in tiny little circles of gold dazzle.  It seriously trips me out - the goldy shimmer.  Aaaaanyhooo....


9.  Lastly, I build a simple pocket page for my letters and cards (and photo cards I find hidden by my children in the couch cushions when I actually clean them out in June or so...).

  • I trim a patterned paper down to 6x12 inches.  
  • Use one of the washi tapes across the top of the patterned paper.  Then place adhesive right along the very edge of both sides and the bottom.  NOT THE WASHI EDGE, of course.  
  • Stick it down and you've got yourself a pocket!
  • Neatly stuff all your letters/misc items in there.


 Voila!

I hope this helps you in some way.  Helps you get your photos off the wall/out of the basket/out of the garbage can :)

I can tell you that my life is so much smoother when I have a plan.  And this simple plan for what to do with my Christmas Card photos makes me happy and feel accomplished.

Have a wonderful day!
Stacey